


How to Stop Your Dog Pulling on the Lead
This article is written by Pet Circle's qualified veterinarian, and last updated by Dr Brittany Ward BVSc
Have you ever taken your dog out and felt like you were the one being walked? We know that walking our dog is beneficial for our health and our dog's health, but a dog constantly yanking on the lead or dragging you down the street can turn it into an unpleasant experience. This article looks at some of the common reasons why dogs pull on the lead and how to address them, so that your walks can become enjoyable for everyone.
Contents:
Why Do Dogs Pull On The Lead?
Gear Up For Success
Can I Use A Collar?
Front-Attaching Harnesses
Head Collars
Back-Attaching Harnesses
Getting The Right Lead
How To Fit A Harness
How To Train Your Dog Not To Pull On The Lead
Loose Leash Method
Penalty Yards
Back and Forth or 180
Be A Tree
Yielding to Pressure
Focused Walking
Important Things to Note
Safety Tips
Lunging and Reactive Dogs
Further reading
Why Do Dogs Pull On The Lead?
Walking on a lead without pulling is an important skill that we need to teach our dogs. This is because having a lead and being restrained isn't "natural", instead they would prefer to be investigating the environment around them. However, the purpose of a lead is not to stifle their drive to explore, instead it allows us to ensure that they stay safe while exploring. This means that we need to show them to become comfortable with the lead and how to explore within its safe confines.
This natural instinct to explore and not being trained how to behave on the leash are usually the cornerstone reasons for why our dogs will pull on the lead. This is often seen in dogs who will pull us towards a particular scent, pull us towards unfamiliar objects or drag you off the footpath into the shrubbery. They just want to get to where they want to go. The natural instinct to hunt drives them to lead their own path, and for domestic dogs, a walk is often their closest alternative to hunting. This hunting instinct can mean pulling is particularly a problem in breeds with high prey drives, like the Irish Wolfhound.
Dogs with high energy levels or those that bred for working, like Labradors and Border Collies may have a higher drive to exercise or run, increasing their likelihood to pull. Dogs bred for sledding or similar pulling activities, like Huskies will also have an natural instinct to pull when attached to a restraint. However, any dog can pull on the lead as they attempt to engage with their environment. Ultimately, allowing our dogs to continue pulling reinforces the behaviour as they learn that pulling rewards them with getting closer to their goal.
Sometimes we can also inadvertently teach our dogs to pull. For example, back-attaching harnesses may encourage our dogs to pull by placing us in a position behind our dog and applying pressure behind them. Most dogs will choose to pull away from any pressure that is applied to them by a harness or collar attached to a lead. A harness or collar used incorrectly can also contribute to the problem. Smaller dogs on short leads that are often at tension can teach the dogs that it is normal for that tension to be there and that they should pull on the lead.
Leash pulling is also seen in reactive or fear aggressive dogs. These dogs can lash out and lunge as they attempt to intimidate anything they are scared of, pulling on the lead in the process. Likewise, anxious dogs may pull desperately as they attempt to escape the source of their fears. Learning to read your dog's body language can help you to determine if this is why your dog is pulling and get your dog out of a stressful situation before pulling starts.
No matter the reason why your dog is pulling on the leash, training them will be the most effective way to resolve it. Just like any training, the first step in teaching a dog to walk on a slack lead involves us communicating to them what we would like them to do instead. High-value treats come in handy for this purpose, so make sure you have some ready to go.
Before any training can be started, we need to ensure that your dog's physical and mental needs to explore have been met. Otherwise, the lead becomes more of a barrier for them to fulfil their needs and your dog will pull as they attempt to fulfil their energy needs. We would then be communicating to them that the reward for pulling is getting closer to what they desire. Dogs that are not sufficiently mentally or physically stimulated are also more engaged with their environment and less responsive to training as they want to provide themselves with mental enrichment.
Not sure if your dog's energy needs are being met? Why not check out our article Boredom Busters for Dogs. This article looks at why dogs get bored, what the signs of boredom are and how to increase your dog's mental and physical stimulation.
Gear Up for Success

You've probably seen some of the many "No Pull" products available on the market or heard the ongoing debate over the "safest" walking equipment. It can get very confusing trying to work out which is the best one.
As a starting point, look for something that is comfortable, but will also provide you with control of your dog at all times to prevent them from getting into dangerous situations like running onto the road. There are multiple different options on the market and the choice will be dependent on the size and breed of your dog, as well as your personal preferences.
Be wary of claims of "No Pull" products, and assess how the product works before committing. No harness, collar or accessory is a cure all just by putting them on. These items are all training tools designed to aid your training process and help your dog learn faster. Because they are tools, most of them are also designed to be weaned off once your dog has learned how to walk comfortably at your side.
Can I Use A Collar?
Collar vs Harness is an age old debate, but which one is better? Each tool has pros and cons, but for any dog that is pulling, a harness is the safest option. The current recommendation amongst most veterinarians and dog trainers is that a collar should 'only be used to carry your dog's ID'.
Any pressure applied to the collar puts strain on the neck, which impacts important structures like the trachea, oesophagus, arteries supplying blood to the head, spine, and can increase pressure in the eyes. A collar should never be used on Brachycephalic breeds, or those with respiratory conditions, cardiovascular conditions, spinal problems (including Dachshunds who are at high risk of IVDD) or protruding eyes (such as Chihuahuas) for safety reasons.
Ideally, if the end goal is for your dog to be able to walk on a loose leash with a collar on and if you are using a training tool like a harness or head collar, you can wean these off, back onto a flat collar once your dog reliably walks on a loose leash. This means that training is the key and your dog should be able to walk at your side without a lead on at all before you use a collar. If there is any possibility that your dog might pull or yank on the lead, then stick to a harness.
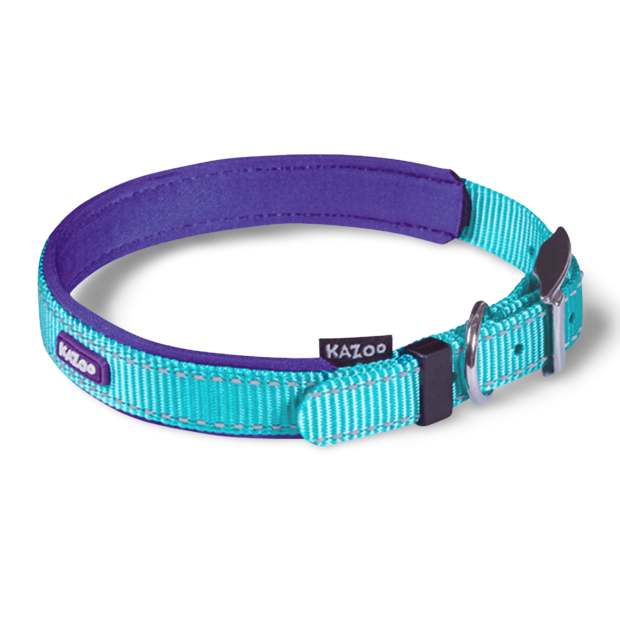
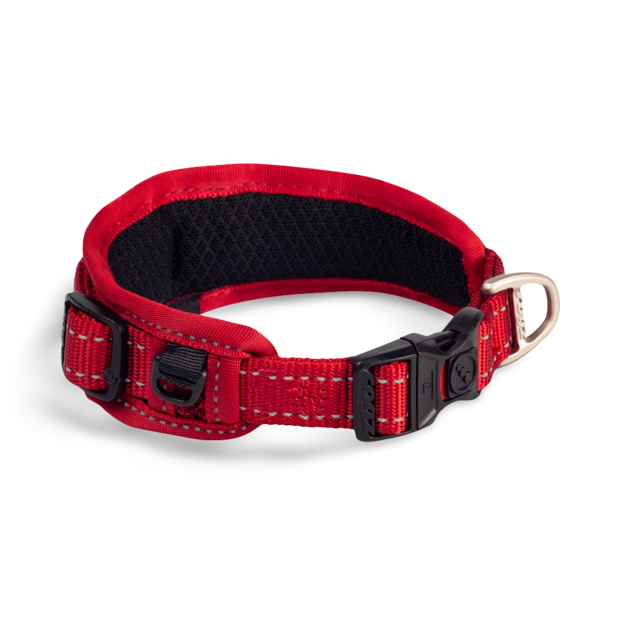
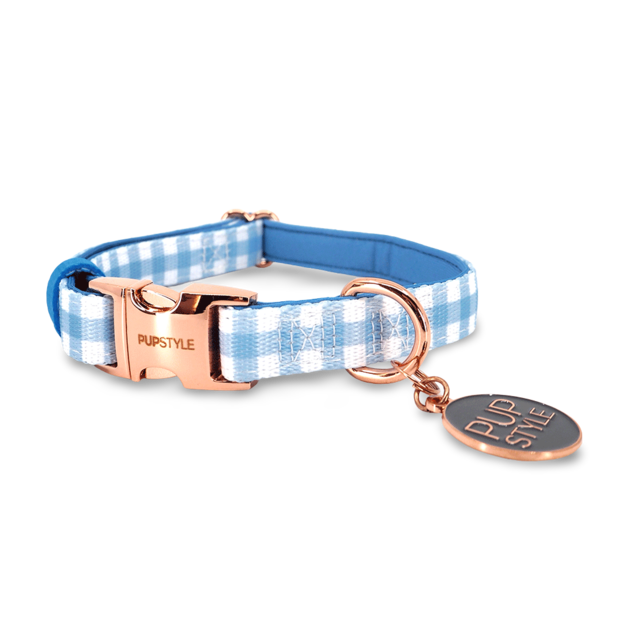
If you ever do use a collar, the right collar should be a flat collar with a buckle, metal buckles are typically better as plastic clips have the potential to break, releasing your hound. The collar should sit high on the neck under the chin and behind the ears, allowing control of the head. You should also be able to easily fit two fingers under the collar, but it should feel snug when they are under the collar.
The collar should not slide down the neck or sit around the shoulders. It should not slip over the head either. If your dog is an extreme puller that chokes themself on a collar, this is not the tool for you. The goal with a collar is for your dog to respond to a minimal amount of pressure, so martingale, choke collars or prong collars should not be used.
Top Recommended Training Collars
Front-Attaching Harnesses
Front-attaching harnesses are a good way to stop dogs pulling on the lead. They work by making your dog pivot when the lead is pulled, so that they are unable to pull with their full weight.
The ring for lead attachment is located at the front of the harness, and many also include a back-attachment for use with a double lead for extra control.
Front-attaching harnesses come in multiple different shapes. H Style, Y Style and Norwegian Harness are the most common shapes that offer a front attachment option. Many of these styles are also available as back-attaching harnesses. Each style has its own pros and cons, as well as recommended dogs that it is best suited for.
The Y Style Harness

The Y Style harness is the most recommended harness type. These harnesses are shaped like a 'Y' at the front where they travel around the neck in front of the shoulders and pass under the chest between the legs. It does not limit movement of the front legs or put pressure on the shoulders or neck, making it a great low pressure harness option. Due to this, it is especially suited to senior dogs or those with neck/shoulder injuries. However, it can be applied to most breeds and are often highly adjustable, making them a great choice for puppies as well.
There is evidence to suggest that this harness style fits the best and places the least strain on the back, neck and shoulders with long term use as long as it is correctly fitted. A Y Style harness should sit centrally on the chest and sternum and divide to rest in the space between the neck and shoulder. It should not cross the shoulders or extend to wrap around the neck.
The Rogz Harness Control below or Sporn Ultimate Control Harness are examples of Y Style harnesses.
The H Style Harness

The H Style harness is similar to the Y Style, but does have a more simple design, compromising on some of the straps. This harness is so named because it makes a 'H' shape with a strap around the neck and one around the chest behind the forelegs, joined by a chest strap. This style also places reduced stress on the shoulders and neck.
The H harness is suitable for daily walks and most outdoor activities and is a popular harness style. This style tends to sit better on narrow bodied breeds or those with a narrow space between the front legs, such as Greyhounds or Poodles.
An example of a H Style harness is the Petsafe 3 in 1 Harness or the Pupstyle Adventure Strap Harness.
The Norwegian Harness or No Pull Harness

The Norwegian harness is a slightly different design to the others above. This is probably the harness most people think of when they picture a 'No Pull' harness. These harnesses have two straps, one around the chest and one in front of the neck. Correctly fitted, these harnesses should sit back from the forelegs (not in the armpits) and should not apply pressure to the shoulders or choke the neck.
The Norwegian harness applies pressure at the centre of the chest, closer to your dog's centre of gravity. Due to the central location of the clip, the pressure is more evenly spread out. Your dog will generally lean away from this pressure, and if they do pull, it will turn them back towards you.
This harness is best suited for heavy pullers and big dogs, like Boxers or Huskies. It is not suitable for pets that have experienced shoulder or neck injuries, or pushed in face (Brachycephalic) breeds.
The Halti Training Front Control Harness and the Procare Training Harness are prime examples of this type of harness.
Top Recommended Front Attaching Harnesses:


Shop Front-Attaching Dog Harnesses Now
Dog Head Collars

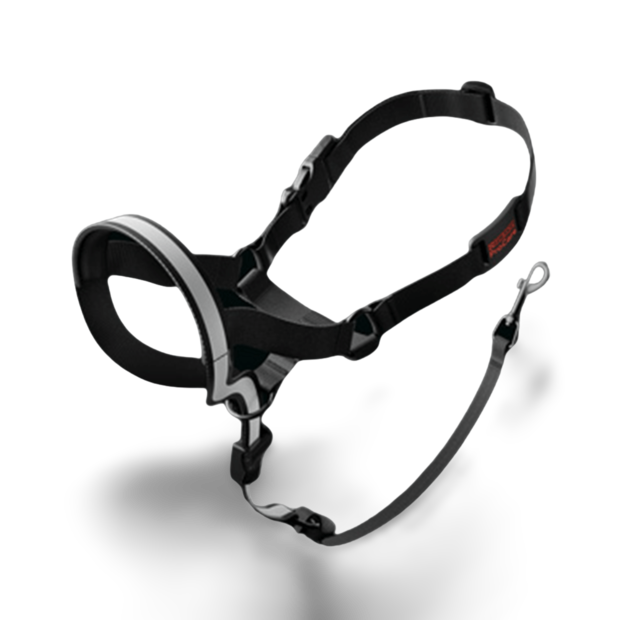
Head collars, also known as head halters, Haltis or gentle leaders, are designed to give you more control of dogs who lunge or pull excessively.
They have two loops - one which goes over the bridge of the nose resting below the eyes and behind the muzzle and the other which loops around the neck. The leash is attached under the jaw where the two loops meet.
They work by offering a comfortable fit and allowing normal panting as long as your dog is walking on a loose leash, but as the dog pulls forward, the loop around the nose tightens, applying pressure to the muzzle. This motivates your dog to drop back to relieve that pressure. If they continue to pull, it will also gently turn the head, pulling the dog back to you.
Head Collars are not designed to be yanked and should not whip your dog's head back if the dog lunges. This is dangerous and could cause harm to your dog's neck. If using a Head Collar on a reactive dog or one prone to lunging, you may need to hold the lead closer to the head to avoid this happening.
The Head Halter is best suited to dogs that pull excessively, high energy breeds, long snouted breeds and for providing additional control in large or giant breeds. Head halters are not recommended for small dogs under 5kg or for dogs with pushed in faces (Brachycephalic breeds) as they will not fit correctly.
Just like any new training tool, you will need to train your dog to wear a Head Collar as it is not natural for them to have something over their face. Without training, they will find the collar irritating and will attempt to remove it. Training your dog to wear a Head Collar is very similar to Muzzle Training.
Hold the snout loop open and use treats to lure your dog's head into the loop. Reward your dog for getting close to the loop and eventually allowing you to place it over their snout then remove it. Repeat this process in small training sessions, each time increasing the duration the Halter is on. Practice placing it around their head and releasing, then clipping it up and leaving it longer and longer each time until your dog is comfortable wearing the Halter for extended periods of time and not trying to remove it. If they do attempt to remove the Halter, wait them out and reward them when they leave it alone.
Top Recommended Head Collars:


Back-Attaching Harnesses
Although they are not designed specifically to assist with pulling on the lead, a back attaching harness is a good option for small dogs, flat-faced breeds like Pugs and French Bulldogs, or dogs with previous neck injuries for whom a head collar or front attaching harness may not be appropriate.
Back-attaching harnesses are not ideal training harnesses. They may encourage your dog to pull on the lead if not used in combination with training due to the application of pressure to the back of the dog, urging them forward as they try to move away from the pressure applied. Back attaching harnesses are commonly used for sled pulling dogs, because of this pressure response.
There are two styles of back attaching harnesses: the Vest Harness and the Step-In Harness.
The Vest Harness

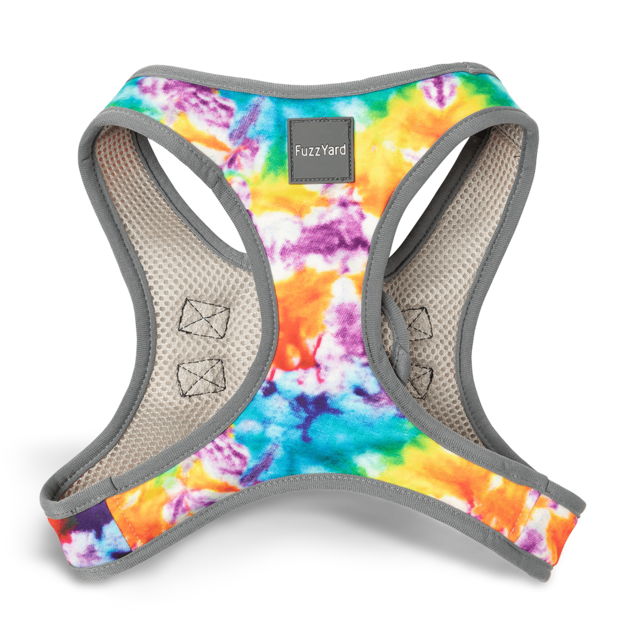
Vest harnesses are a padded 'Y Style' harness designed to provide additional support and protection, particularly for those with back or neck injuries. Many owners feel comforted knowing there is extra padding in these harnesses, and there aren't straps rubbing on their pets.
Vest harnesses may not be suitable for dogs with a narrow chest and should not rub under the arms or choke the neck if correctly fitted. Like the Y Style harness, they should sit along the point between shoulder and neck.
Puppia and Fuzzyard offer a wide range of adorable vest style harnesses.
The Step-In Harness

The Step-In harness is a modified 'H Style' harness designed to be applied by having your dog step into them and then they fasten at the back. A correctly fitting Step-In harness will not rub under the arms or restrict movement of the front legs.
Step-In harnesses are easier to use for dogs that are averse to over the head harness styles. They can also have a reduced risk of slipping out of the harness when fitted correctly. The Step-In style is best suited to small dog breeds like Jack Russsell Terriers or Shih Tzus.
Top Recommended Back Attaching Harnesses:


Shop All Back Attaching Harnesses
Getting The Right Lead
Did you know that the type of lead you use can also impact your dog's training? A lead is another training tool and a safety measure for when we are out on a walk. That means having the right lead can determine how successful your dog's training is.
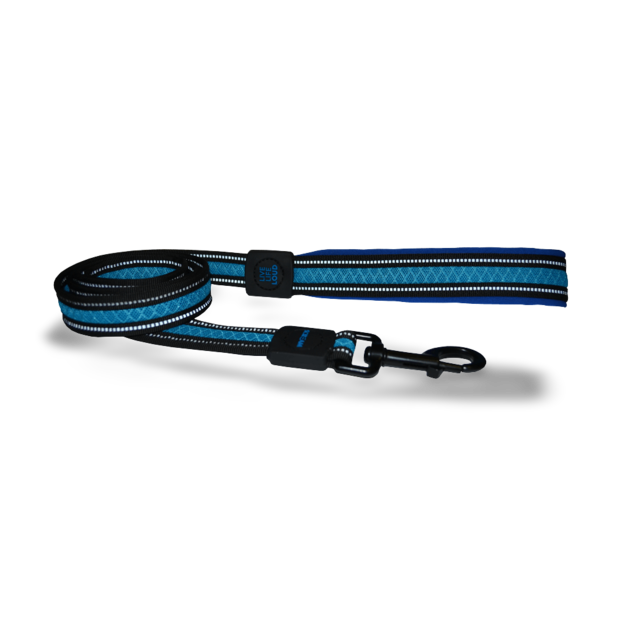
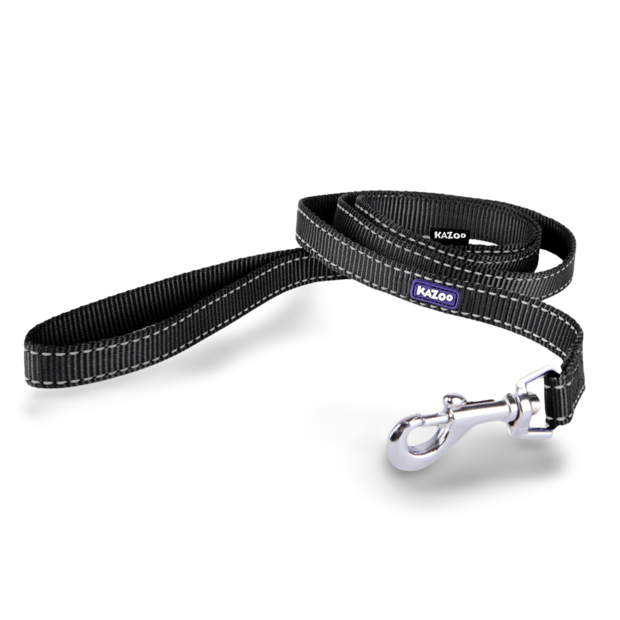
The ideal training lead is a fixed lead 6-10 feet long that allows your dog to walk on a slack leash. If you have a small dog, you may require a slightly longer lead so that they can walk at your side without the lead being at tension. It's also recommended to avoid thin leads, ropes and chains, as these may cause abrasions or burns to your hands while trying to restrain your dog.
For strong dogs that require greater control, or might be prone to lunging, a double lead with two attachment points may be the most suitable option when training your dog not to pull. Depending on the training method you opt to use, some dogs may do better on a long lead or recall line. Long lines allow more freedom to roam and explore, but still offer the ability to reduce your dog back to a short line and recall your dog to your side.
What About Retractable Leads?
Retractable leads are not suitable for use when training dogs not to pull. In fact, they are not recommended for training at all. This is because your dog is required to pull the lead to increase the length of their lead. This also means there is constant tension on your dog's lead, often even as the lead retracts. Ultimately, your dog learns to pull to increase the leash length and is rewarded by getting where they want to go. Dogs trained on retractable leads will also pull on fixed leads because of this pull and reward system. Bungee style leads may have a similar effect and encourage pulling.
Additionally, retractable leads offer poor control with rapid release to extend the lead length that can only be stopped by a lock that may fail, or you may not be able to respond quick enough to stop. Retractable leads also tend to be thin, tape leads that will cause abrasions or burns if you attempt to grab the lead.
Top Recommended Training Leads:


How to Fit a Dog Harness
How to Train Your Dog to Stop Pulling on the Lead

Before training starts, allow your dog to explore in an enclosed dog safe space and burn off some energy unrestricted. The best time to do any training is when all their basic needs have been met and there are as few distractions as possible. In order to get the best results when training your dog to walk on a slack leash, start in the house or backyard where there are minimal distractions and slowly increase the difficulty as your dog becomes reliable at walking on a slack leash.
Before Your Training Session Starts:
- Manage your dog's excitement levels. Give your pup some time to calm down from the excitement of going for a walk before leaving your house, yard or car.
- Let them sniff the immediate area before moving, to familiarise with the area.
- Praise your dog when they've settled. A sit command can be used for this to assist with attaching the lead. Teaching your dog to 'heel' can also be beneficial for this.
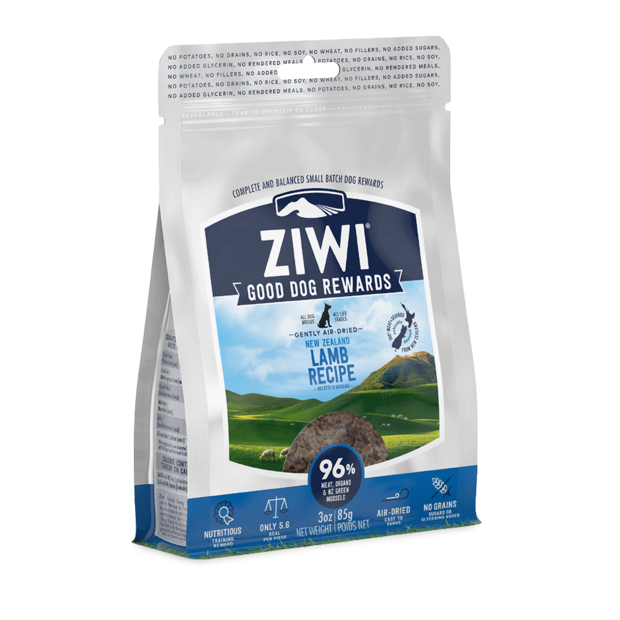
- Prepare your dog's favourite reward, such as treats, a favourite toy (soft toys, especially those with squeakers, and tug toys tend to work the best), or be ready to praise them.
Top Recommended Training Rewards:


Now you are ready to get started! There are several methods that are suitable to use when training your dog to walk on a slack leash. Not all methods may suit your dog. We've gone through several methods below, and discussed which dogs will benefit most from the technique. Choose a technique that you think your dog will be the most responsive to.
Choose a Training Technique

Loose Leash Method
Who is this method most suited to?
The Loose Leash method can be used for most dogs that pull, but can be especially useful for strong pullers as it does combine other techniques. This method teaches them that walking on a loose leash will get you moving to where you want to go, plus rewards!
Training the Loose Leash Method
To start the Loose Leash method you are going to pick a quiet spot and stand still. Wait until your dog comes to your side and loosens their own leash. When their leash is loose, mark and reward with a treat or two. Allow them to do this multiple times until they start to stay within the confines of the lead.
Once your dog stays on a loose leash consistently, take one or two steps forward, keeping the lead loose. If the lead does stay loose, mark and reward. As your dog becomes reliable at keeping a loose leash, increase the number of steps you take by one or two at a time.
As your dog improves and is able to walk several steps forward on a loose leash, you can add in a cue to start walking, such as 'let's go', 'walk' or 'with me'.
If your dog starts to pull, stop and take a couple of steps backwards. This tells your dog that pulling gets them further away from where they want to go. Once the lead is slack again, start forward a couple of steps and reward, teaching them that the loose leash gets them where they want to go.
Penalty Yards
Who is this method most suited to?
The Penalty Yards Method is great for the explorers and independents who have more engagement with their environment than their owner. For any dog that just wants to get where they are going, this is a great technique.
Training With The Penalty Yards Method
The Penalty Yards Method relies on taking your dog away from where they want to go. For your dog, getting to what they are trying to reach is the goal. So when your dog starts to put tension on the leash quickly back up to the starting point. Praise them once the leash goes slack again and offer a reward once they are at your side.
Once your dog is back at your side, start walking forward again, so the slack leash and walking beside you gets rewarded with approaching their desired destination. Repeat this back and forth process as required until they get the hang of walking at your side. Slowly you will be able to increase the distance you walk each time, before you are going backwards.
This technique means that your dog gets further away from where they want to go and will motivate them to observe what behaviours get them moving forward so that they can continue to explore. Here, the reward is moving forward and reaching the goal.
Back and Forth or 180
Who is this technique best suited for?
Got an easily distracted pup? Maybe a high energy dog that just wants to go, go, go? Then this is the technique for you. This technique is best to use if you are happy to walk with no goal in mind, such as in the backyard, street or a straight footpath, because chances are you may not reach your goal, especially when you first start training.
Training the Back and Forth or 180
This is a relatively straightforward technique to use that teaches your dog to be engaged with you and where you are going. All you have to do to start training this technique is start walking. Once your dog starts to pull on the leash or just before the leash goes tense, turn around 180 degrees and start walking back the way you came.
Repeat this process as required. When you first start out, you may feel like you are walking in circles, but this will quickly teach your dog to watch where you are going because your direction could change at a moment's notice. Walk confidently and turn confidently, you are leading the way. Every time your dog looks at you, offer them a treat reward. This builds a positive association between your dog and engaging with you.
In regards to walking on a loose leash, once again, the reward for walking with the leash loose is getting to move forward towards your dog's goal.
Modified Versions of Back and Forth
There are several training techniques that are similar to the Back and Forth technique and teach your dog to match their movements to yours. These modified techniques work well for high energy dogs.
â¢Big Square: Instead of turning 180 degrees, sharply turn 90 degrees. This still changes your dog's direction and teaches them to pay attention to what you are doing. You can also try alternating whether you turn left or right as your dog gets better at watching you. If you are turning in front of your dog, cut them off, but be careful not to stand on them.
â¢Big Circle: For this technique, make sure your dog is on the outside of you as you turn a complete 360 degrees, instead of 180. Keep turning in a circle until your dog is focused on you and back at your side on a loose leash, then praise and walk forward again.
â¢Figure 8:The Figure 8 is an exercise you can do with your dog to get them back to focusing on where you are walking. Rather than spinning in a circle, walk in a figure 8 shape, initially your dog will be on the outside as you turn, but their path will get cut off if they aren't watching you when you loop the other way. You may need to do a large figure 8 and initially go slowly so you aren't tripping over your feet or your dogs.
For all of these techniques, be sure to reward your dog by walking forward while the leash is slack, and mark and treat reward whenever they look at you to ensure you are reinforcing the behaviours you want to see more of.
The 'Be A Tree' Method
Who is this technique best suited for?
This is a technique for dogs with more owner engagement and that are a bit more advanced in their training. Your dog will need to want to come back to you for this technique to work well.
Training the 'Be A Tree' Method
This technique relies on teaching your dog that pulling won't work. If your dog starts to pull, stop and plant your roots. Initially, your dog will want to keep going forward, wait them out. There will be a point when your dog looks at you, turns around and/or puts slack in the leash and comes back to you. When they do, mark and reward, then start moving forward again.
As you keep going, your dog will learn that releasing the tension on the leash gets them moving forward again (and treats), so they will be quicker to return to you and become more reliable at walking on a loose leash.
Yielding To Pressure or 'Silky Leash'
Who is this technique best suited for?
This is a technique for dogs that are sensitive or responsive to gentle pressure on the leash, and is a great starting point for puppies. It also requires an owner with a gentle hand and a bit of patience. This technique is adapted from horse training, so those with horse experience might find this easier to adapt.
Training Your Dog to Yield To Pressure
Your dog's natural response to pressure is to pull away from where it is applied. Here, you are instead teaching them to move towards the pressure. This technique is going to need to be started in a small enclosed space and on a standard lead. This works well with a flat collar. Be sure to have the lead in one hand and be ready to reward with the other.
While your dog is standing, put light tension on the leash in one direction. The amount of pressure should not pull or tug the dog, it should be light enough that it 'wouldn't break a strand of silk'. If your dog responds to this pressure by moving, looking or even shifting their weight in the direction of the pressure, mark and reward. Be sure to reward in the direction of the pressure that was applied to lure them into the behaviour you would like to see. If your dog doesn't respond at first, hold the pressure until they do move towards it.
The more times you repeat this, the more rapidly your dog will respond to follow the leash pressure. This should teach your dog to release tension on the leash by going in the direction of the pressure, so that on a walk, if the lead reaches tension, they will come back to your side. Be sure to slowly increase the level of difficulty for this one.
Focused Walking
Who is the technique best suited for?
This is a great option for highly food motivated dogs and it relies heavily on treats. Dogs that have done target training or know the 'touch' command will also adapt to this quickly. High energy dogs that just want to play will also like this technique.
Training Focused Walking
To start with, this isn't an obedience training technique. This is a fun game to play with your dog! It just so happens to teach loose leash walking and engagement with you along the way. It provides a great defence for you against dogs that want to chase distractions.
This training requires two hands; the treat hand and the lead hand. Your treat hand will be on the same side as your dog walks. The lead hand is where you will also place your clicker if you prefer to use these for your training. Fill the palm of your treat hand with your dog's favourite treats.
On the treat hand, hold out one finger, and encourage your dog to follow your finger. Remember to make it an exciting game! Once your dog gets close to your finger target, mark/click and reward. Here you are teaching your dog target training. You are also teaching them to follow your finger.
Once your dog follows your finger, you can start teaching them to follow your finger while standing up and while walking. As they become more reliable, you can move the treats from your target hand to the other hand, rewarding occasionally whenever they are doing the right thing. You may also be able to add a command to this like 'follow' or 'target' to use around distractions and get your dog back to following your finger instead.
Important Things To Note

Engagement: Often a dog's behaviour on the lead can be a reflection of how engaged they are with their owner. Working on your dog's engagement with you may significantly improve the quality of your walks as they learn to check in with you and look to you for guidance rather than racing off to explore. There are lots of games you can play with your dog to strengthen your bond with them. You can also teach them engagement games or commands, such as 'Look At Me'.
Rewarding: When trying to improve your dog's engagement on a walk and around distractions, you need to be rewarding at the right time. It's great to reward your dog when they are walking on a slack leash, but you also want to reward your dog any time they look at you. Mark with a click, consistent praise or sounds like 'yes' and offer a treat to tell them you like that behaviour and want to see it again. Capture as many organic occurrences of engagement or loose leash walking as possible. Your dog will learn much faster if they are exhibiting the behaviour out of choice and that choice was reinforced.
Persistence: Like with any training, persistence is essential for achieving the desirable outcome. You will need to pick a technique that you think will work well for your dog and stick to it. Changing techniques can confuse your dog and delay your training. Each technique will take time to learn, so be patient and persistent with it. Even dogs that learn quickly may need a reminder every now and then.
Distractions and Difficulty: Start in a low stimulation environment. Many dogs pull because they are distracted, so start in the house or backyard where your dog has few distractions and can be focused on you. As your dog becomes confident in their skills, increase the number of distractions (you might be able to get friends and family to help with this) and slowly increase the difficulty, moving into the street, then a walking track, then the park, beach, markets etc. With each new level of difficulty, you will probably need to go back to step one. If your dog seems to be struggling to respond, drop back the level of difficulty.
Professional Training: It can be challenging training a dog any new skill. If you are finding it difficult and your dog isn't responding to training, reach out to a professional, reputable trainer for assistance and additional obedience training. Remember that solidifying your dog's basic obedience can help to improve any training and increases your dog's response to more difficult tasks.
Teach Your Dog To Wait: Prevent the door dash! Our dogs are often over excited and eager to explore and we've all seen a dog push through a door and take off. Walking is a reward, so teach your dog to ask for it and teach them not to run off into the distance. This is a great way to get your dog calm before you start your walk. You will spend a lot of time sitting and waiting at doors with your dog on leash to learn this. Start to open the door, if your dog moves from their sit, close it immediately. This way, going outside is the reward. Remember you will need to start again with each new door like the front gate, the car door, the house door, etc.
Things to Avoid
When choosing training tools, avoid anything that is designed to inflict pain or discomfort to attempt to correct undesirable behaviour, such as choke collars, prong collars or electric collars. Martingale collars can also cause harm if used incorrectly, so we recommend avoiding these. There are many ways to train your dog without using these tools and with the use of positive reinforcement based training.
Never yank on the lead. This is especially important if your dog is on a collar. Yanking on the lead can desensitise your dog to the application of pressure on the lead, but it also risks injuring your dog. It is particularly dangerous in dogs with neck or spinal issues or Brachycephalic breeds with respiratory conditions.
It is my recommendation that children do not walk or restrain dogs. Even the most well trained dog could potentially bolt if distracted. They could potentially pull over or injure your child by doing so. This is also important as children may not be as quick to react in an unexpected or potentially dangerous situation to protect themselves and the dog. Children may also pull or tug on the lead, providing mixed signals to your dog and encouraging them to pull. I also do not recommend tying leads to strollers or prams as the dog could drag the stroller. This could also potentially perpetuate pulling by creating a "sled" situation.
Safety Tips
It is important to keep you and your dog safe at all times. Remember that even the best trained dogs may find something that grabs their attention and then take off.
Most trainers will teach your dog to walk on your left hand side as this is the obedience standard. However, if you are walking along a road or past potential distractions, it is recommended to keep your dog on the inside, furthest away from the potential danger. Stick to footpaths wherever possible and walk facing oncoming traffic. You can also teach your dog commands to keep them safe, such as 'Heel', 'Stop', 'Leave', 'Wait' and 'Stay'. You can also teach directional commands like 'Right' and 'Left'.
If your dog pulls in dangerous situations or lunges, such as chasing bikes or cars, then avoid these situations until your dog builds up confidence walking on a loose leash and slowly increase your proximity to them.
In case the unexpected happens, always have a plan in place for how to respond and how to protect yourself and your dog. Most of the time, if your dog lunges or pulls suddenly, the best solution is to turn and leave the situation.
For more dog walking safety tips, check out our article Essential Dog Walking Tips.
Lunging and Reactive Dogs

If your dog is lunging, barking or charging on a walk, particularly in a reactive or aggressive manner, then there may be a more serious underlying reason for their pulling on the lead. This will need to be addressed before your dog can begin training to stop pulling on the lead.
A reactive, lunging dog is overwhelmed and overstimulated, they cannot respond to commands or training. A dog that is pulling in this situation, needs to be removed from the situation. Turn around and walk in the opposite direction to the trigger. Keep walking away until your dog has settled down and is responsive to commands again. If you are unable to walk away, restrain your dog and ask the trigger to leave if possible.
If you have a reactive dog, I would recommend contacting your local vet, talking to a reputable trainer, managing their underlying anxiety and preparing a behavioural management plan before taking your dog out into public. These dogs will need to have the underlying cause treated before they can be responsive to training for loose leash walking.
Owning a reactive or aggressive dog can be quite a challenge. It takes a lot of management and training to get your dog to a point where they can have a happy and fulfilling life. We have an article discussing reactivity, how to manage it and what training is usually involved: Training a Reactive Dog.
Further Reading
What is the Best Harness for My Dog?
Want to know more? Check out our Discover Page for more tips from our expert vets on keeping your pets happy and healthy.
References:
Controlling Pulling on Walks - VCA Hospitals
Loose Leash Walking by Grisha Stewart
Leash Walking Grisha Stewart
Practice Loose Leash Walking to Avoid Being Pulled
Loose Leash Walking Fundamentals
Sit Stay Learn Dog Training Videos
Safest Dog Harness
How to Choose a Harness for Your Dog